The Node Manager facilitates the management and control of WebLogic Server instances in a clustered environment. Its primary role is to start, stop, restart, and monitor server instances remotely. It ensures that servers remain running and can automatically restart them in case of failure, supporting high availability and fault tolerance.
Identify these installation parameters:
| Variable | Example |
|---|---|
| MW_HOME | /opt/oracle/occas/8.1 |
Create a Node Manager Domain
Within each domain, you can configure the Node Manager. However, the most elegant approach is to create a custom domain and let the Node Manager manage all other domains. This page will guide you through the process.
Run the Configuration Wizard again.
config.sh
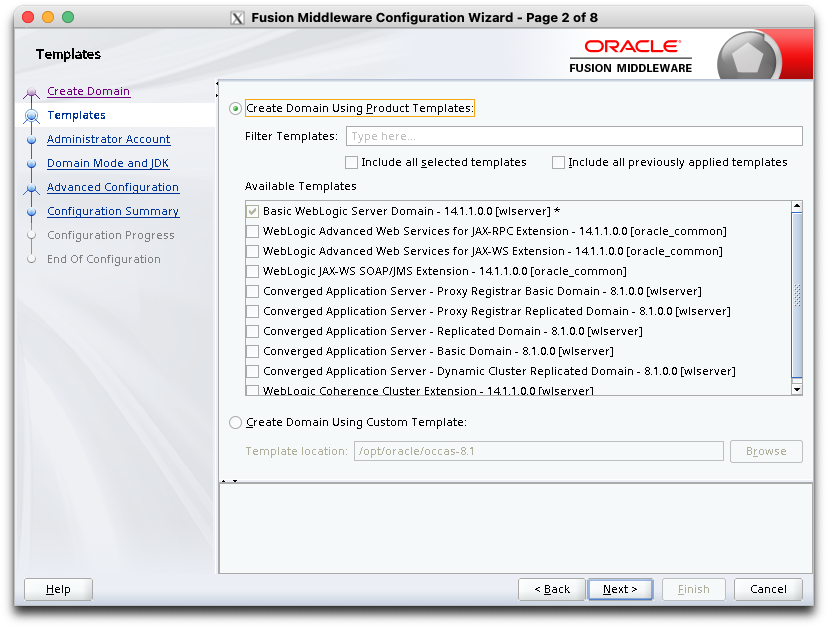
Create Domain
Create a new domain and name it "NodeManager".

Templates
Do not select anything except for the default Basic WebLogic Server Domain.
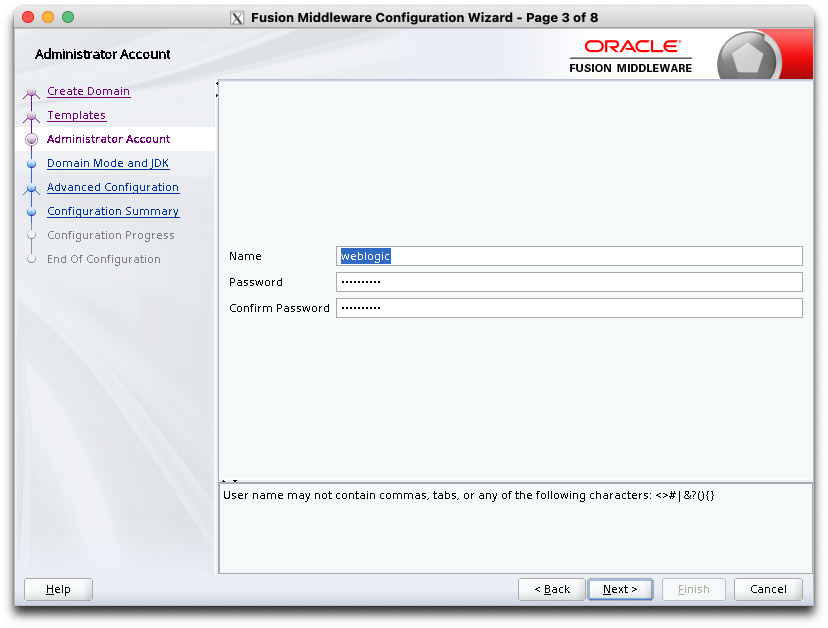
Administrator Account
Select a username and password.
Domain Mode and JDK
Select Development mode.

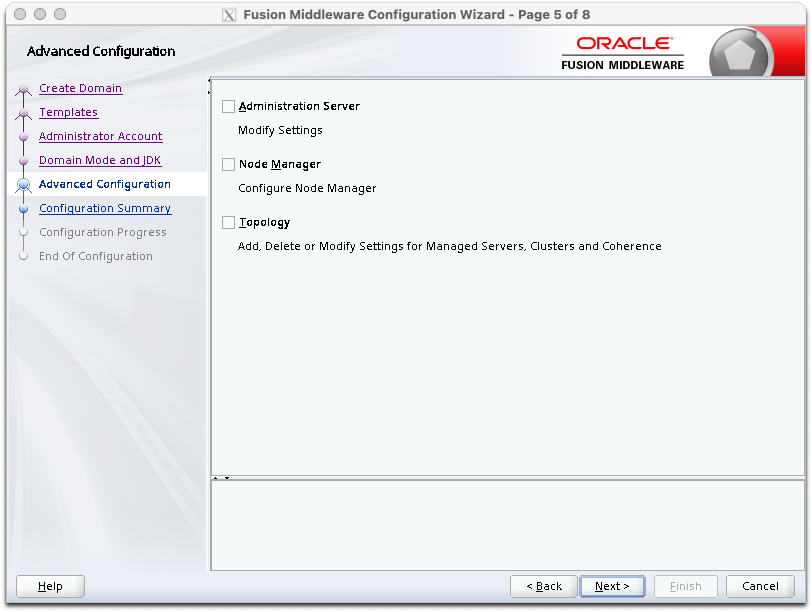
Advance Configuration
Do not select anything.
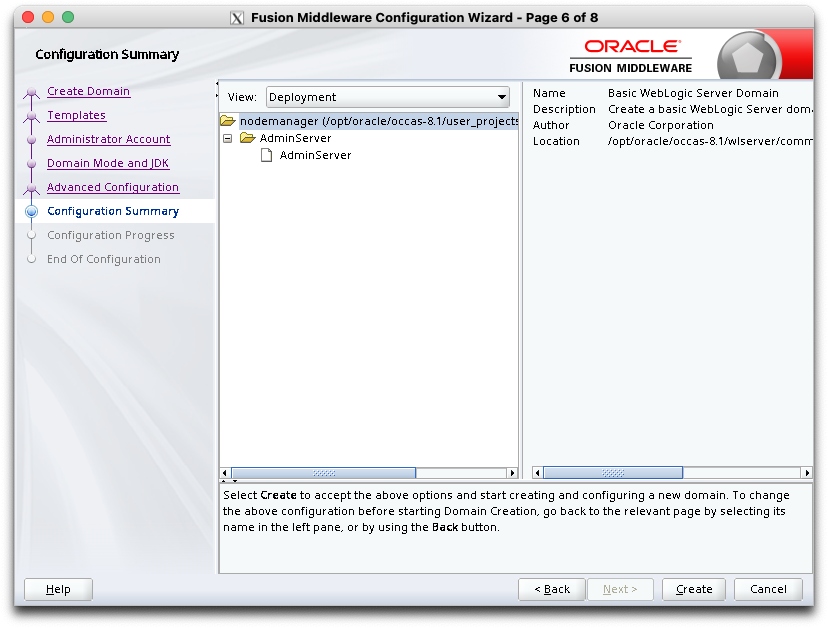
Configuration Summary
Click Create to continue...
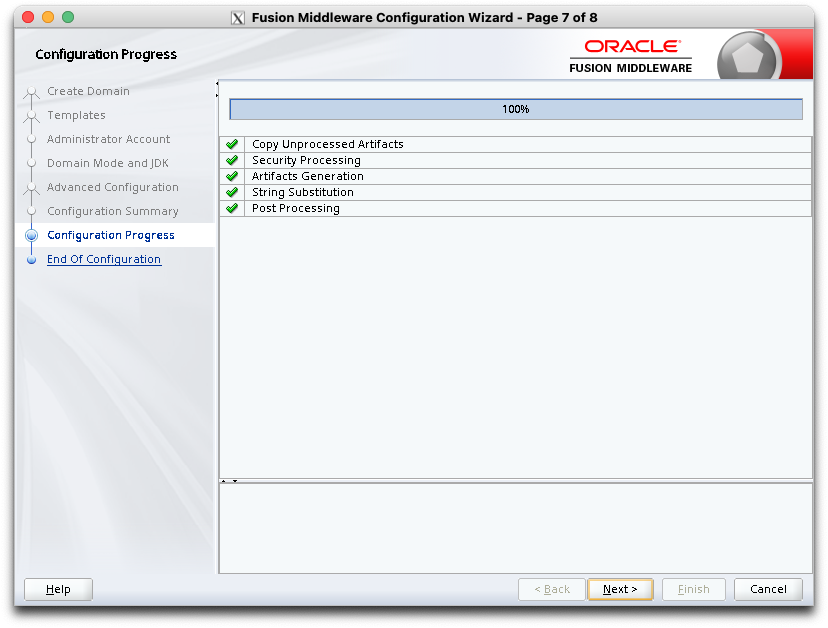
Configuration Progress
Click Next to continue...
End of Configuration
Click Finish to complete the configuration.

Domains
Edit this file to add our "replicated" domain to Node Manager:
$MW_HOME/user_projects/domains/nodemanager/nodemanager/nodemanager.domains
Properties File
Node Managed can be configured through a properties file located at:
Change the Listen Address
Change the listen address from 'localhost' to a reachable IP address. Why not listen on all addresses?
ListenAddress=0.0.0.0
Disable Start Script
In WebLogic 12.1.1 (and higher), the nodemanager has been modified to use the "startWebLogic.sh" script to launch WebLogic. I prefer the old technique because it allows creating custom startup parameters for each server.
weblogic.StartScriptEnabled=false
Disable the Secure Listener
Temporarily disable the secure listener for testing. We will re-enable it later when securing WebLogic.
SecureListener=false
Enable Crash Recovery
Should WebLogic crash, we want Node Manager to restart it.
CrashRecoveryEnabled=true
Starting Node Manager
You can start Node Manager by hand using this command...
/home/oracle/NodeManager/bin/startNodeManager.sh
Admin Console
Now we need to make some configuration changes to the domain. The best way to do this is from the Admin Console.
Modify Servers
By default, the Replicated Domain Template creates a cluster with one admin server (AdminServer) and two engine-tier servers (engine1 and engine2).
Let's modify these servers and add a new one.
The quickest way to do this is to delete engine2 and recreate it by cloning engine1.
Let's also create an engine0 server by cloning engine1 as well. We will run engine0 on the same server as the AdminServer for testing purposes.
Now that we have 3 identical servers, change the Listen Address to the IP address that each server will use.
In the configuration settings for the engine servers, add these values:
Maximum Message Size
This is an annoying error that pops up frequently... We need to increase the "Maximum Message Size".
For each server in the cluster, navigate to "Protocols / General".
Add an extra zero for the Maximum Message Size, from "10000000" to "100000000".
Sever Start
For each server, navigate to "Configuration / Server Start".
Class Path
Arguments
Notice the -Xms12g -Xmx12g? This allocates 12GB of RAM for the JVM by setting the max (Xmx) and the min (Xms). A good rule of thumb is to set them both to 70% of the free memory on your system.
How did we arrive at these other values? If you start the managed server by hand, the system out screen will reveal it.
[oracle@occas1-engine1 bin]$ ./startManagedWebLogic.sh engine1
.
.
JAVA Memory arguments: -Xms256m -Xmx512m -XX:CompileThreshold=8000
.
CLASSPATH=/opt/oracle/occas/8.1/wlserver/../oracle_common/modules/com.oracle.webservices.wls.wls-jaxrpc.jar:/usr/lib/jvm/jdk-11.0.24-oracle-x64/lib/tools.jar:/opt/oracle/occas/8.1/wlserver/server/lib/weblogic.jar:/opt/oracle/occas/8.1/wlserver/../oracle_common/modules/thirdparty/ant-contrib-1.0b3.jar:/opt/oracle/occas/8.1/wlserver/modules/features/oracle.wls.common.nodemanager.jar:/opt/oracle/occas/8.1/wlserver/sip/server/lib/weblogic_sip.jar:/opt/oracle/occas/8.1/occas/server/lib/platform/oracle.sdp.occas.depended.jar:/opt/oracle/occas/8.1/wlserver/sip/server/lib/wlss-runtime-rest-proxy.jar:/opt/oracle/occas/8.1/wlserver/common/derby/lib/derbyclient.jar:/opt/oracle/occas/8.1/wlserver/common/derby/lib/derby.jar
.
PATH=/opt/oracle/occas/8.1/user_projects/domains/replicated/bin:/opt/oracle/occas/8.1/wlserver/server/bin:/opt/oracle/occas/8.1/wlserver/../oracle_common/modules/thirdparty/org.apache.ant/1.10.5.0.0/apache-ant-1.10.5/bin:/usr/lib/jvm/jdk-11.0.24-oracle-x64/bin:/usr/lib/jvm/jdk-11.0.24-oracle-x64/bin:/home/oracle/.local/bin:/home/oracle/bin:/usr/local/bin:/usr/bin:/usr/local/sbin:/usr/sbin
.
***************************************************
* To start WebLogic Server, use a username and *
* password assigned to an admin-level user. For *
* server administration, use the WebLogic Server *
* console at http://hostname:port/console *
***************************************************
Starting WLS with line:
/usr/lib/jvm/jdk-11.0.24-oracle-x64/bin/java -server -Xms256m -Xmx512m -XX:CompileThreshold=8000 -cp /opt/oracle/occas/8.1/wlserver/server/lib/weblogic-launcher.jar -Dlaunch.use.env.classpath=true -Dweblogic.Name=engine1 -Djava.security.policy=/opt/oracle/occas/8.1/wlserver/server/lib/weblogic.policy -Dwlss.maddr.enable=true -Dweblogic.security.SSL.minimumProtocolVersion=TLSv1.2 -Dweblogic.servlet.ClasspathServlet.disableSecureMode=false -Dweblogic.servlet.ClasspathServlet.allowedPackagesInSecureMode=com/bea/wcp/sip/mps/lib/type/mpssnapshot.class;com/bea/wcp/sip/mps/lib/type/mpsrecord.class -Djava.system.class.loader=com.oracle.classloader.weblogic.LaunchClassLoader -ea:com.bea.wcp... -Dwlss.replication=on -Dwlss.callstate.manager.classname=com.bea.wcp.sip.replicatedstore.server.CoherenceCallStateManager -javaagent:/opt/oracle/occas/8.1/wlserver/server/lib/debugpatch-agent.jar -da -Dwls.home=/opt/oracle/occas/8.1/wlserver/server -Dweblogic.home=/opt/oracle/occas/8.1/wlserver/server -Dweblogic.management.server=https://occas1-admin:7002 weblogic.Server
User Name
Password
Create Machines
In the WebLogic Admin Console, create 'machines' to logically represent each physical server (VM or bare-metal). Assign the "Node Manager Listen Address". This will be the IP Address that the Admin Console will use to contact the node manager.
Navigate to the machine / Configuration / Node Manager.
Set the Type to Plain. (We will add security later.)
Set the Listen Address to the IP Address of the server it is running on. (It can't be "0.0.0.0".)
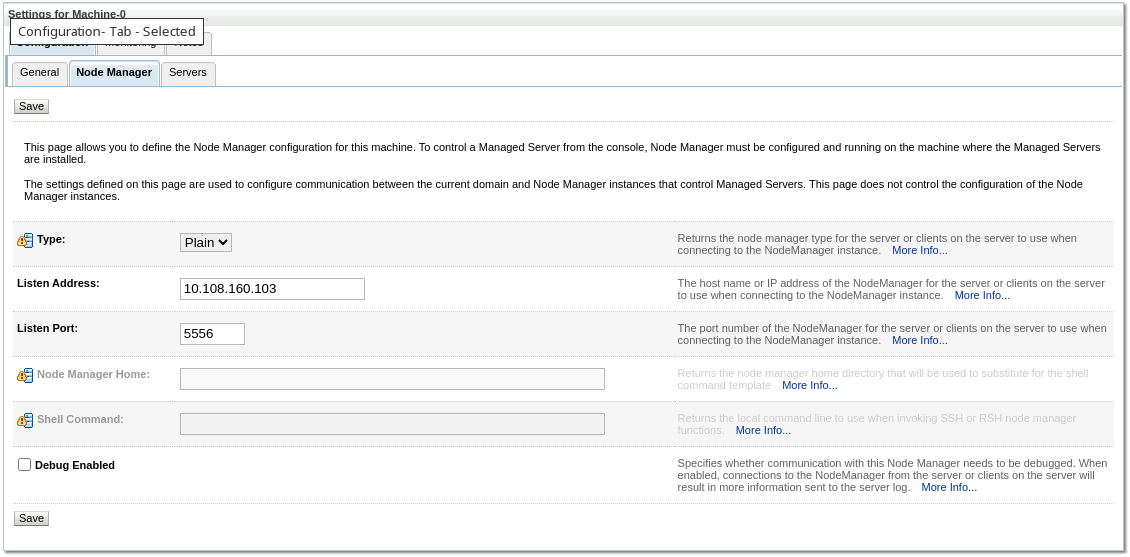
Do that for all the machines.
Copy Files
If you're not using a shared filesystem (typical), this is the time to copy our installation of OCCAS to the managed nodes.
Zip up the 'occas' directory, and copy it to each managed node and unzip it in the exact same location.
This will allow us to start OCCAS on each server.
We still have more configuration changes to make, but OCCAS will pull down a new configuration on restart.
Congratulations! You are now ready to move on to Startup Scripts.